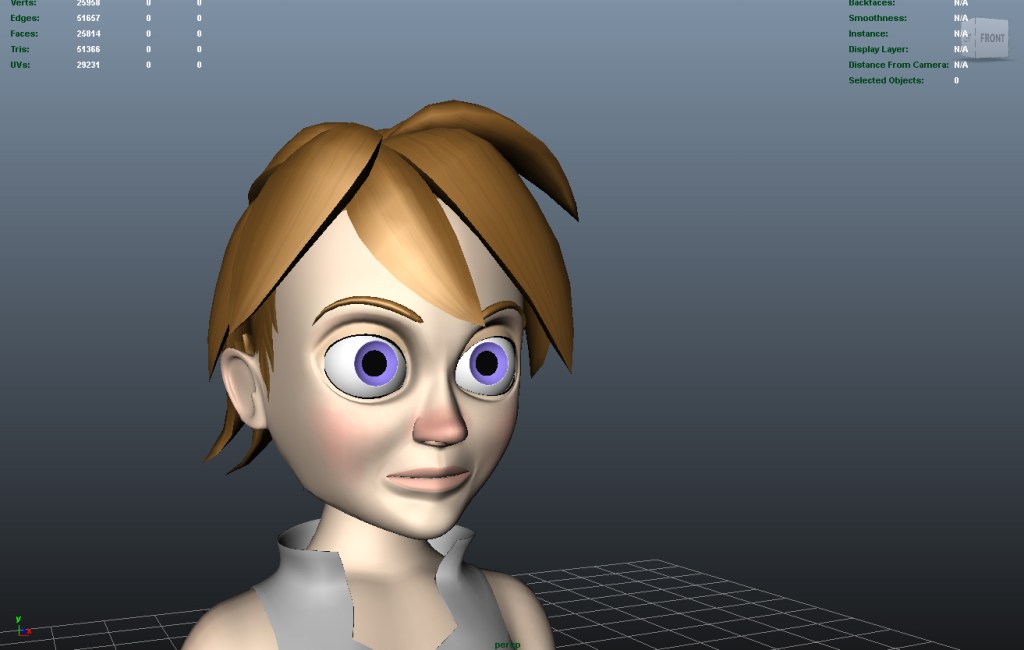
About a month ago I took one of my character designs and turned it into a computer model. At first it was just a refresher on my Maya modeling skills but once modeled I created both high poly and low poly versions, textured the character, added animation friendly features like eyes, hair and the inside of the mouth.
For the past few weeks since I have been challenging myself to rig that character in my free time. The original point of starting this model was to challenge myself so I wanted to make this rig with as many features for animation as I can. Currently, I have rigged the arms, the legs, the torso and the head and in such a way to make it as convenient for animation as possible.
Here is a link to a video demonstrating some of the features of the rig.
The features for this rig currently are as follows:
- keyable relative rotation and translation space for the head
- IK and FK controls for the torso and head
- modular body parts (can turn off or replace limbs)
- switchable IK and FK controls for the arms and legs
- extra animation features for animating the feet (foot roll, tilt, toe wiggle and toe pivot)
- squash and stretch for the torso, neck, arms and legs for both FK and IK
Like I said, I started working on this rig mainly to practice my Maya modelling skills and I originally didn’t intend to add so many features and fully skin and rig it. But recently I realized not only would it be for the best to see this to the end but to have something that can demonstrate my ability to rig models. Anyway, here is a brief overview of the modeling process.
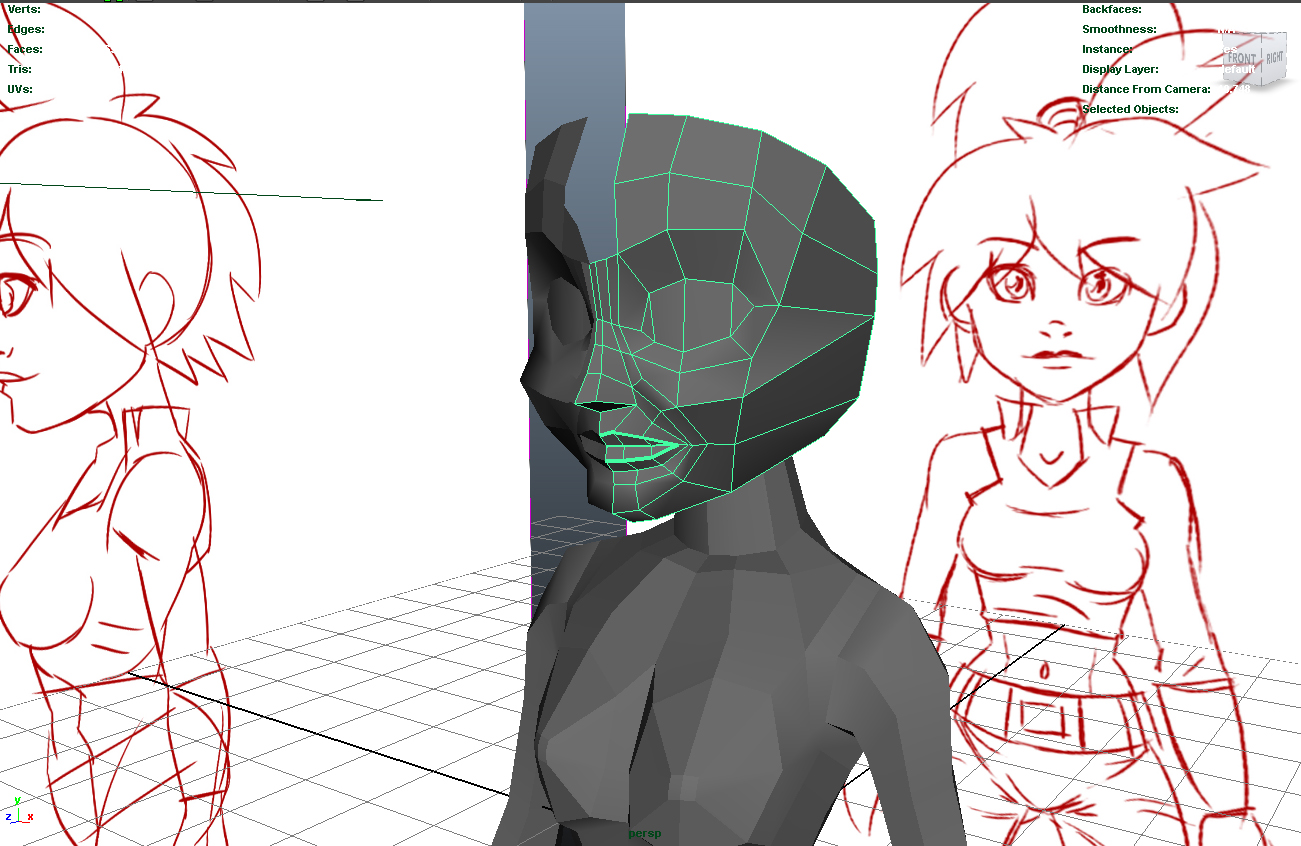
Modeling in Maya is a little less straight forward than doing so in Zbrush, but the advantage is the amount of control you gain on the topology which is very important if you intend to animate a characters face or have any amount soft body deformation.
Here you can see an early part of the modeling process when I was working on the face. Typically you use simple geometry at first along with the duplicate special tool to create a mirrored instance of your model. That way you can control the layout of your models topology while ensuring symmetry.

Eventually I had a low poly version of the character at roughly 12,000 faces and a high poly version with roughly 30,000 faces. At this point I was ready to move forward with applying textures.
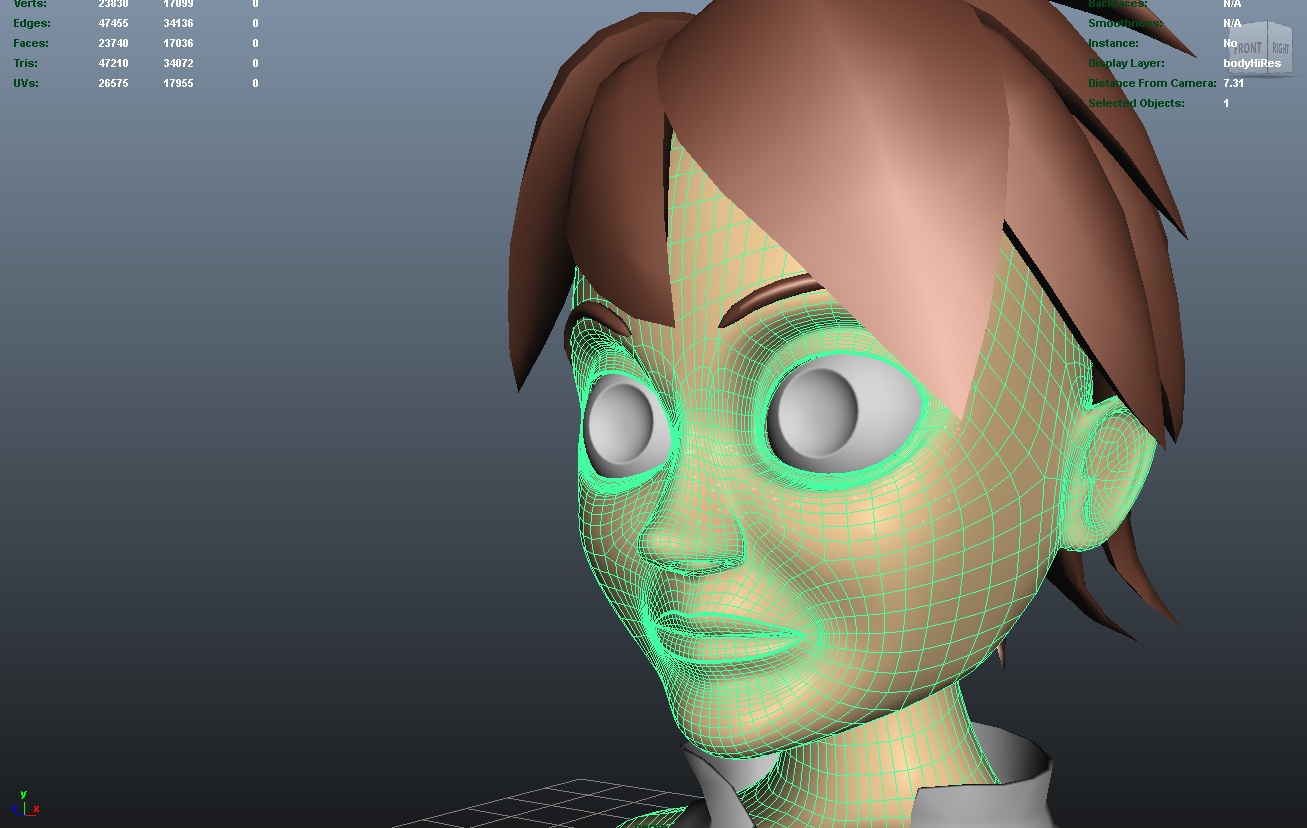
(an early example of the high poly version)
The next step after modelling the character is placing textures on the model. Texturing is pretty straight forward, I would say most of the work is in unwrapping and cleaning up the UV’s.
UV mapping is the process where you take a characters mesh in 2D form and flatten it for placing a texture on your model. The U and V refers to the two dimensional coordinates used for determining the 2D axes of the texture on the models 3D surface. You would think they would just use X and Y (leaving out Z), but they cant because X, Y, and Z (and interestingly, W) are already taken for the 3D space. So they picked U and V to represent the coordinates for placing textures.

Once I had the textures working the right way, I moved on resolving to come back once the rigging was finished. Replacing the textures is fortunately as easy as replacing the texture file so once I was sure everything was where it should be I moved on once I realized that I wanted to rig this character.
One of the most important things I’ll try to remember for the future is to model in a T pose, always. When I first was modeling this character I was using a character design I made for a 2D platformer I had prototyped a while back since I just wanted to practice old school modelling in Maya. This of course made rigging the arms a challenge as they were down and at an angle.
I still have more to do before this rig is finished, some of the features I plan on adding:
- rigged hands with pose blending controls like finger spread, hand cupping, relaxed pose and fist pose.
- rigged fully expressive face using blend shape deformers with detailed controls
- eye target controls with keyable world space
- rigged hair with controls
- skinning the high poly model
- better looking textures
I want to finish this rig in the next couple of weeks. Either way I’ll be returning with more about this rig and eventually releasing it for download on my website!


Leave a comment